After I filled up my Mac Mini’s hard drive with my encoded videos from my DVD collection there was not much more I could do till I ordered the Qnap NAS. This would be the most expensive peace of my Media Center setup.
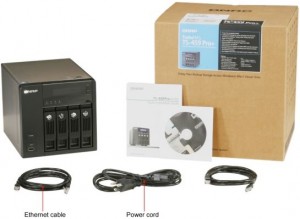
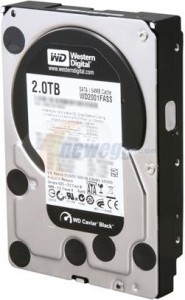
After reading about NAS solutions online and talking about it with friends who have experience with such devices I proceded to order a four bay Qnap NAS TS 459 Pro+ Turbo NAS with five, 2 Terabyte Western Digital Caviar Black hard drives. The spare hard drive is incase one of the other harddrives fail.
I ordered both the Qnap NAS and the Western Digital hardrives from Newegg. I have had good experiences ordering products from them in the past and this was no different.
Both the hardrives and the Qnap arrived well packaged on a Friday. It was Martin Luther King weekend and I had all three days to work on this project.
The first thing I did was head to a local Electronics store and picked up this APC Battery Backup, and this Apple Airport Wireless Extreme Base Station. I spent a lot of money on this equipment and I don’t trust it to Juneau’s dirty electricity.
 From unboxing everything to final setup only took me an hour. Which was great! I think it speaks volumes on how easy setting up a Qnap NAS. It also left me with a three day weekend to enjoy.
Following the easy to read directions for the Qnap, I took out four of my five harddrives totaling 8 Terabytes worth of storage and inserted them into the Qnap Unit. I plugged in my APC Battery backup and plugged the Qnap and the Apple Airport into it, then plugged an ethernet cable from the Qnap to the Airport and turned it all on. By default the Qnap wanted to set up it’s self as a RAID 5. The unit supports other RAID options, but I chose to go with it’s suggested default of RAID 5. It took the Qnap maybe twenty minutes to partiton the harddrives and set its self up as a Raid 5 server.
RAID 5 IN A NUT SHELL
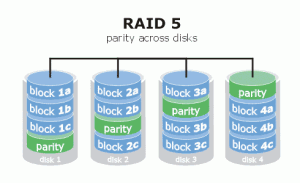 RAID 5 means is that event hough I loaded up 8 Terabytes of harddrive storage, I would have 6 Terabytes of usable storage. If I have understood what I have read the data I store on the Qnap is more or less available on two of the harddrives at any one time. The point of this is that one harddrive of the four can fail and I wont necessarily lose any data. Should that happen I would just follow the easy to read directions it came with regarding how to replace the failed hard drive. The Qnap system will rebuild it’s self and all will be right in the world again.
YOU STILL NEED TO DO BACKUPS
Let me stress to anyone who does a project like this or owns a computer in general, please back up your data. I still do backups. Things I keep on the Qnap that I can’t afford to lose, things like photos, home videos, and documents I still back up off of the Qnap on to another hard drive monthly.
![]() With the Qnap up and running I first went into the settings and enabled Time Machine backups. Again, this was a simple process that only took a couple of minutes. Before long every computer in my house (that would be 5) where backing up wirelessly to the Qnap Nas.
With the Qnap up and running I first went into the settings and enabled Time Machine backups. Again, this was a simple process that only took a couple of minutes. Before long every computer in my house (that would be 5) where backing up wirelessly to the Qnap Nas.
Next I went into the settings enabled APC Protection. Should my house lose power for longer then to minutes the Qnap Nas which would be running off the APC battery at this point would shut down after 2 minutes if the power is not restored.
Finally I setup a shares and users accounts on the Qnap NAS. This allows me to store the encoded movies I had on the Mac Mini on the Qnap. After transferring over the movies I was able to start encoding more of them again.
FINAL THOUGHTS ON THE QNAP NAS
At the time of this post I have had the Qnap Nas for a little over three weeks now with no real complaints. I was able to set the whole thing up in under an hour and it’s been very easy to use. I do recommend the Qnap, but also know I have no bases for compression. This is the first NAS I have ever setup.
The Qnap is capable of doing much more then it currently is. I really want to explore the tons of options it has. I do need to compete this first task before I start playing with it more. I have to finish encoding my DVDs first, then I will go back and see what other Qnap options I might like to play with.
 I have discovered that the Qnap and iPhoto 11 do not get along well togetherl. This is because of the format of the hardrives in the Qnap. iPhoto 11 requires HFS+ formatted hardrives to run correctly. Qnap does not support that format (yet). My workaround for this has been to use a separate external hardrive for iPhoto 11 which I also backup. I could keep all the photos and iPhoto 11 on my main computer’s harddrive, but I have so many photos that the space it requires is very large for me. At this point it just makes sense to keep it on a separate external drive.
In my next post I am going to be talking a little bit about file and media organization.

